I haven't had an overly productive sewing week, however I did had a productive fabric-collecting week! A few local quilt shops had an annual sale and Miss Evy-Pop and I were lucky enough to check them out.
Yes, I did find some pretty new treasures, but I also had some productive discussion about half square triangles. There are so many ways to accomplish this look and I am excited to share a few new-to-me tricks with you all as we walk through this sew-a-long.
Are you ready for Block #1? Colleen Fifield of Sewing for Sawyer, has put together a beautiful tutorial for us. You can follow her by clicking the link. I will embed her info in this post as well for ease of access.
Thank you everyone so much for joining us! The response to our little sew-a-long has been incredible and heart warming, we appreciate everyone so much for being here with us.
Here are the important details to note before you get started:
Fabric Requirements: 2 yards of a solid fabric, 2 yards of a coordinating fabric or fabrics (we are using a combination of coordinating solids and prints).
Finished Quilt size: 50.5″ x 50.5"
If you choose you can do all 16 blocks or stop at 9 or 12 blocks. 9 blocks with sashing would give you a quilt of 38.5″ x 38.5″ and a 12 block quilt would give you a quilt top of 50.5″ x 38.5″. Both would be a lovely size for a lap quilt or baby quilt.
We are so excited to get started with our first block, it’s a very simple but very pretty block that I love. You can do almost anything with it colour wise so don’t be afraid to experiment with your colours and see what you like together.
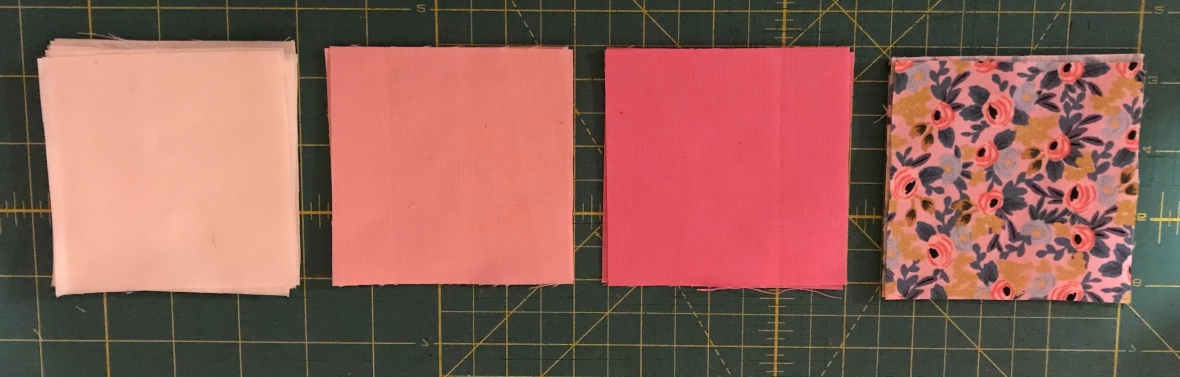
I have chosen white as my main for this block and then shades of pink and flowers for the accent colours. You will need:
8 x 3.5″ squares of white or another solid
8 x 3.5″ squares of contrasting colours
Finished Block Size: 10.5″ x 10.5″
The pinks here are part of the Kona Solids Blossom bundle from Mad About Patchwork The florals here are also from MAP from Rifle Paper from the Menagerie line. The white is a Kona Solid in Snow
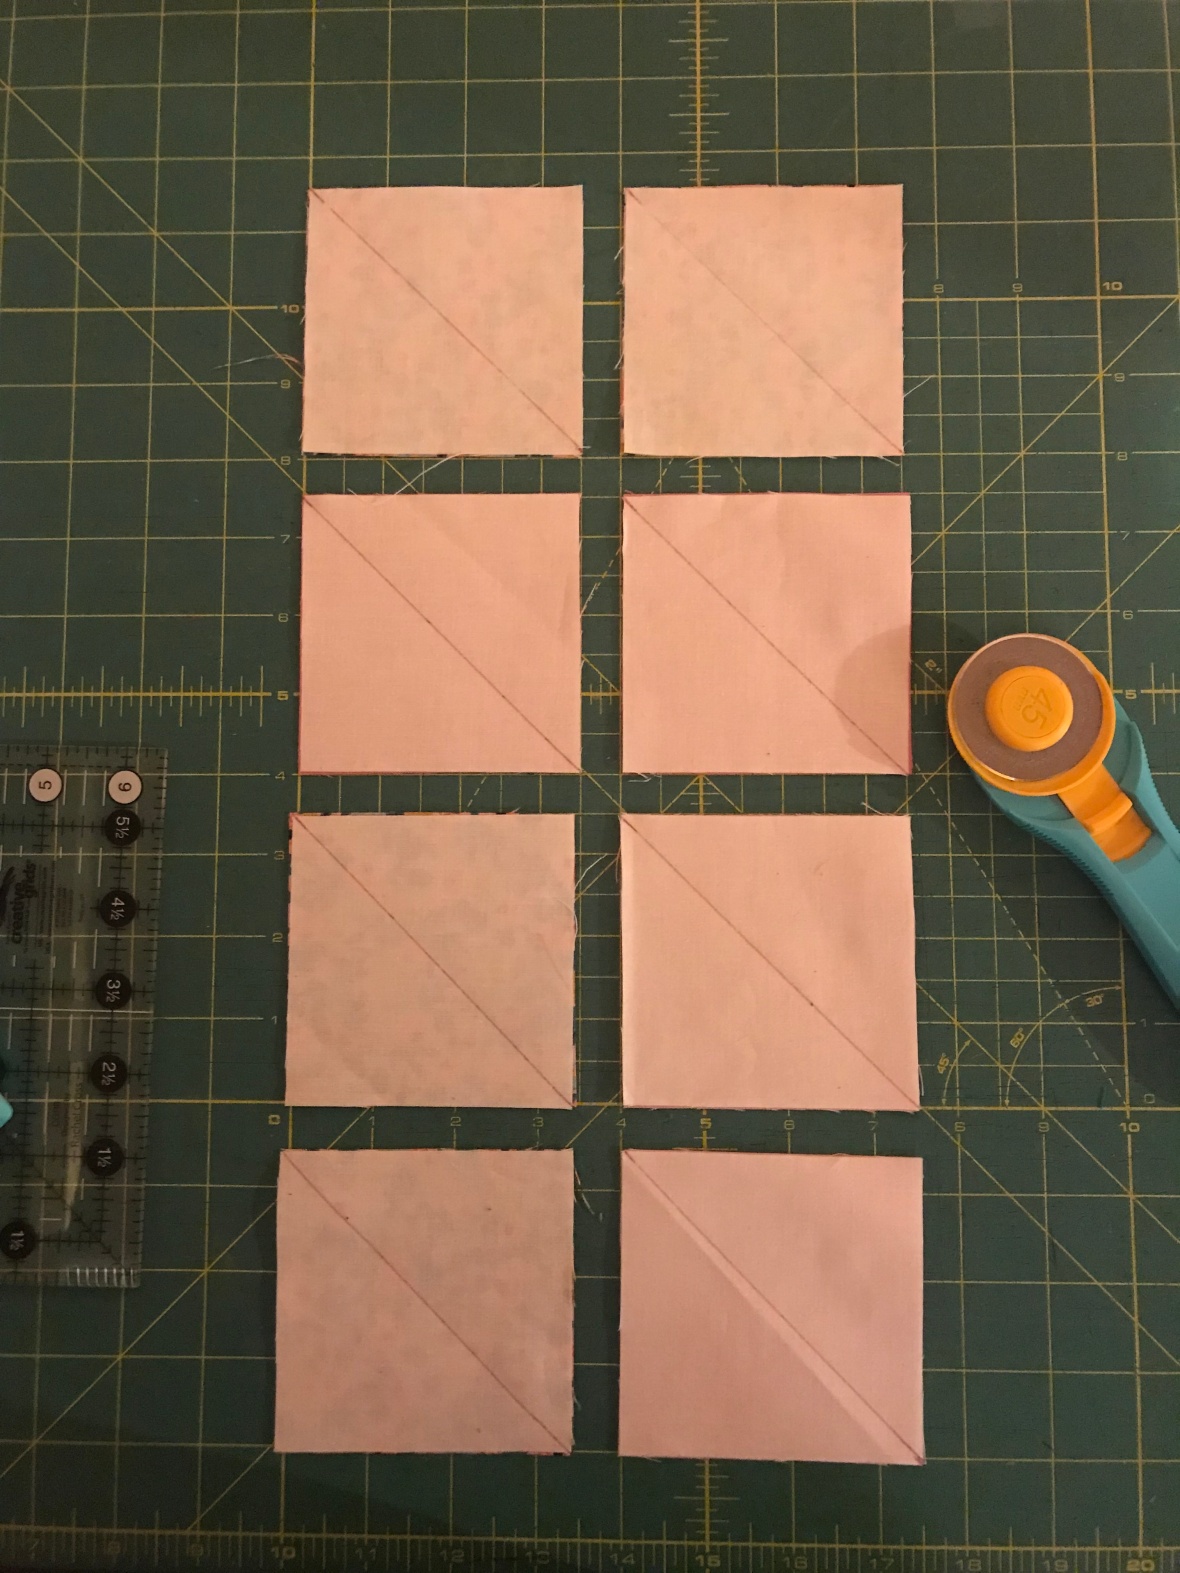
Place your solid squares on top of your coloured/patterned pieces and continue with the usual HST construction:
I like to chain sew when doing something like this – it saves time with lifting your foot, cutting the thread and putting a new piece in – do all 8 blocks down one side, cut the thread, turn it around and do the other side:
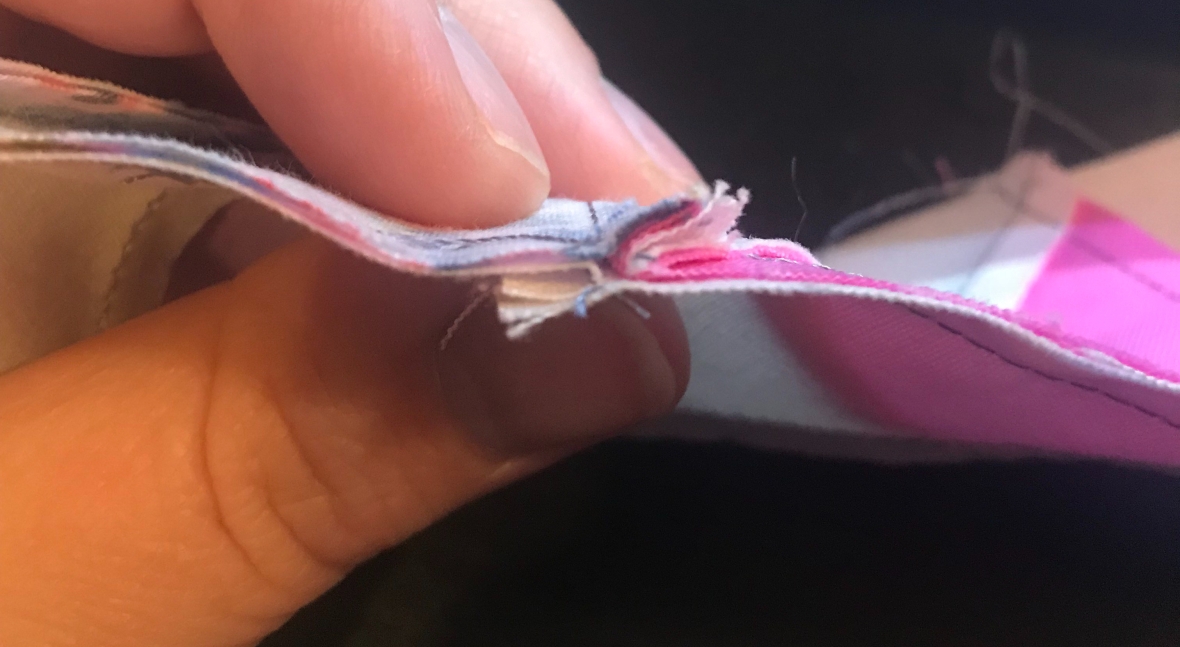
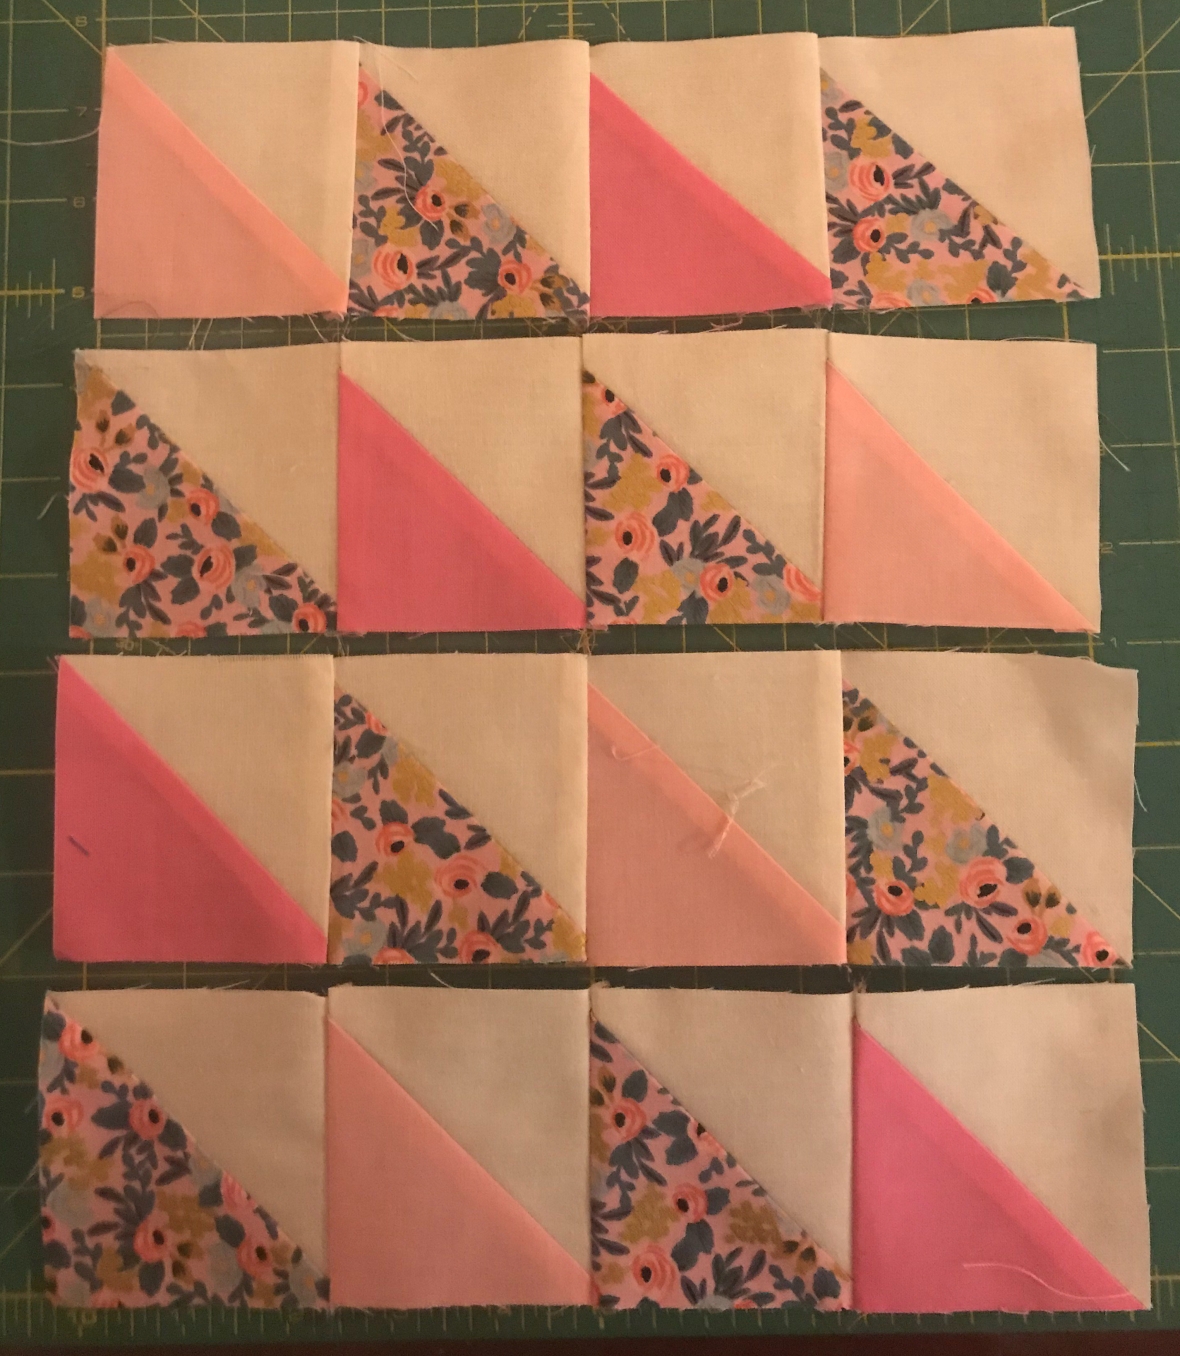
Snip your pieces apart and then using your ruler cut down the middle. Press your seam allowance to the dark side. At this point you should have 16 blocks.
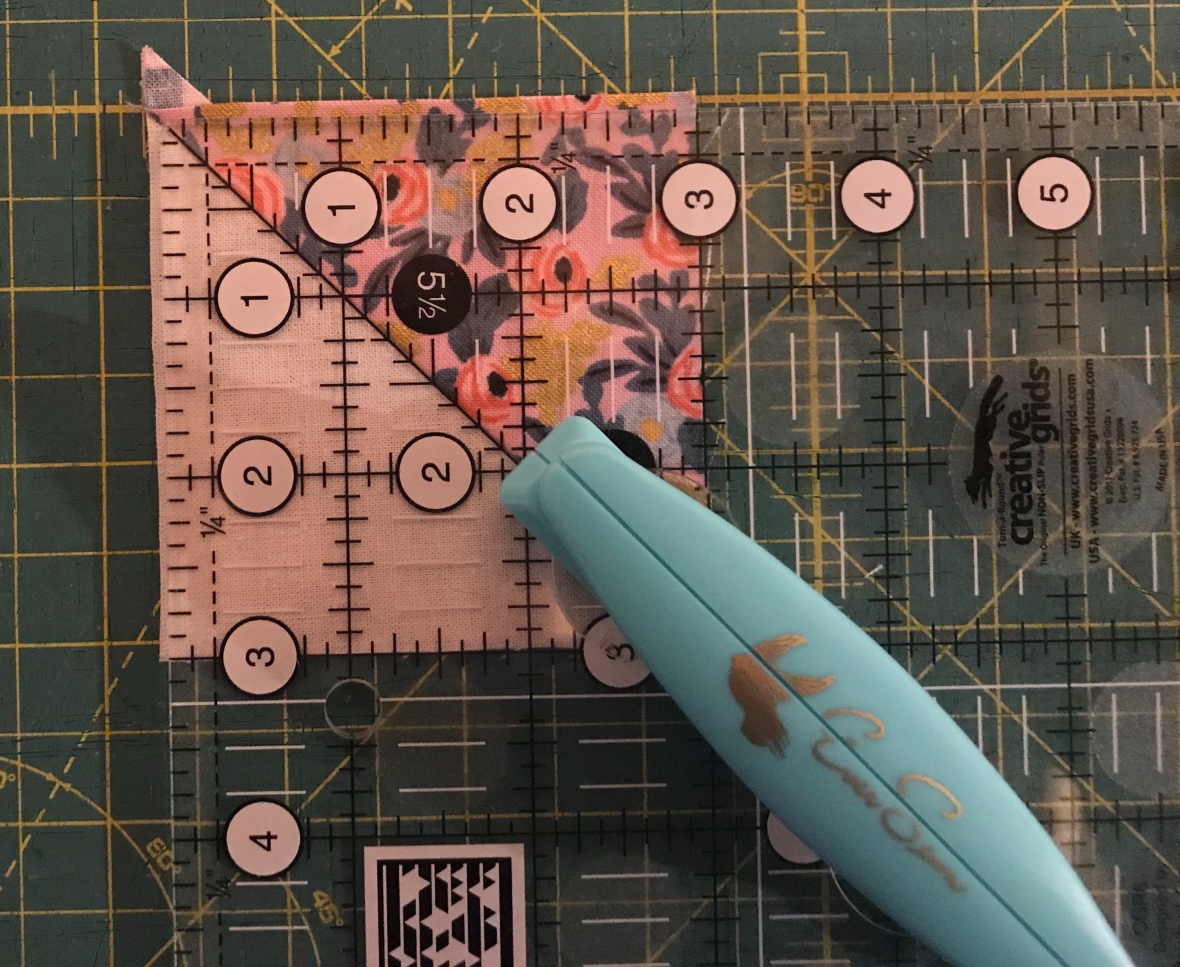
For our pattern we will need each finished block to be 3″ so you may need to trim your blocks slightly, this is called squaring up. Place your ruler with the diagonal line on the centre seam of the block and trim the block down to 3″ Using the diagonal line on your ruler will help with making sure that you take equally from each side:
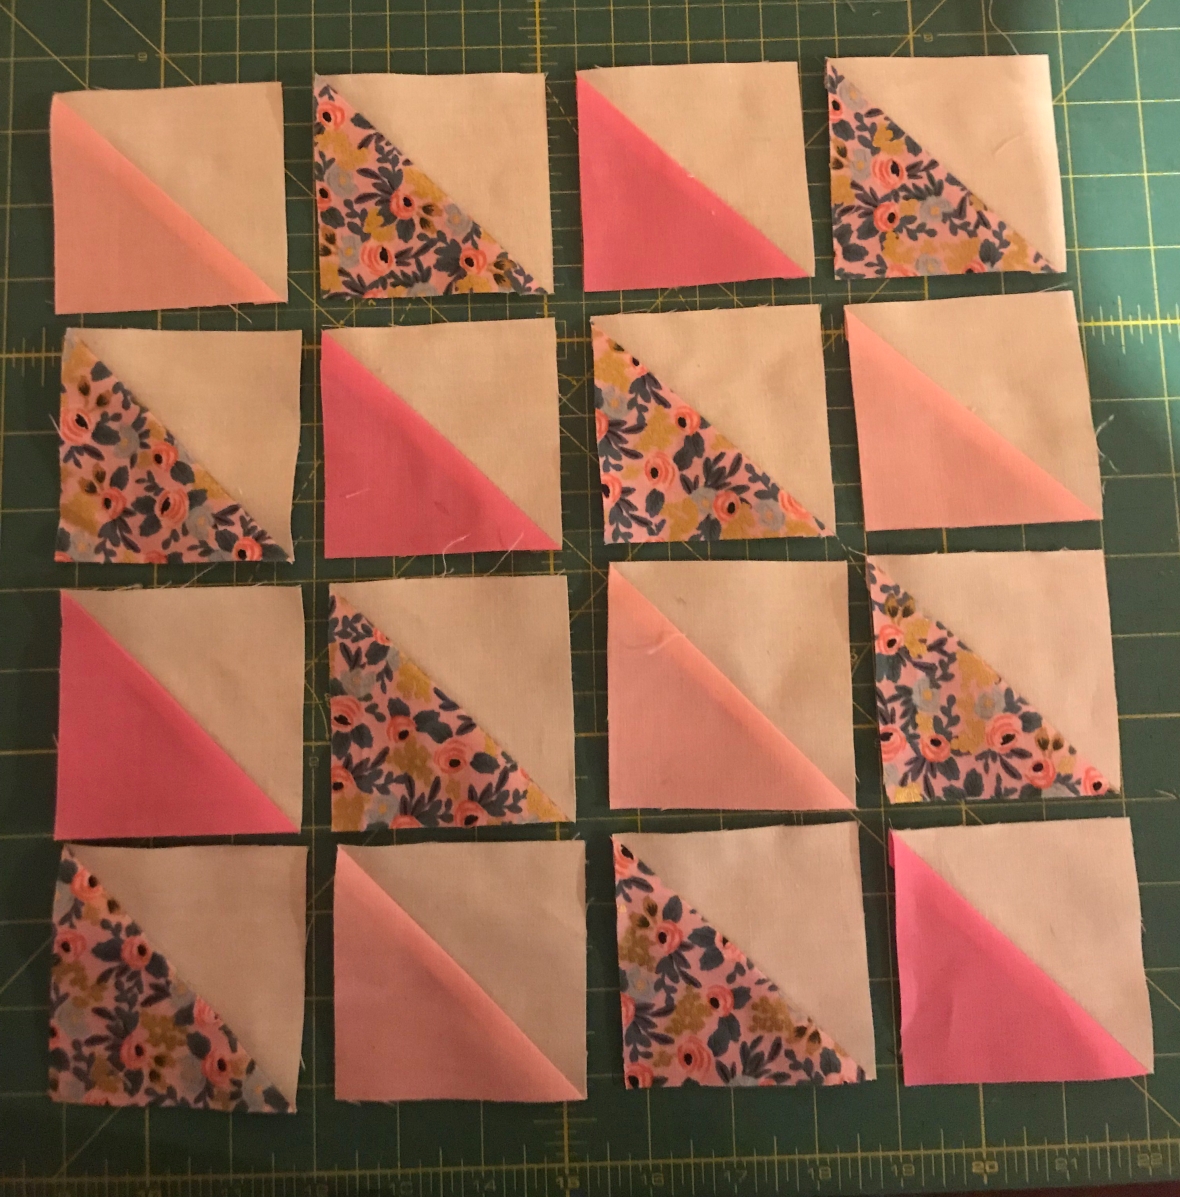
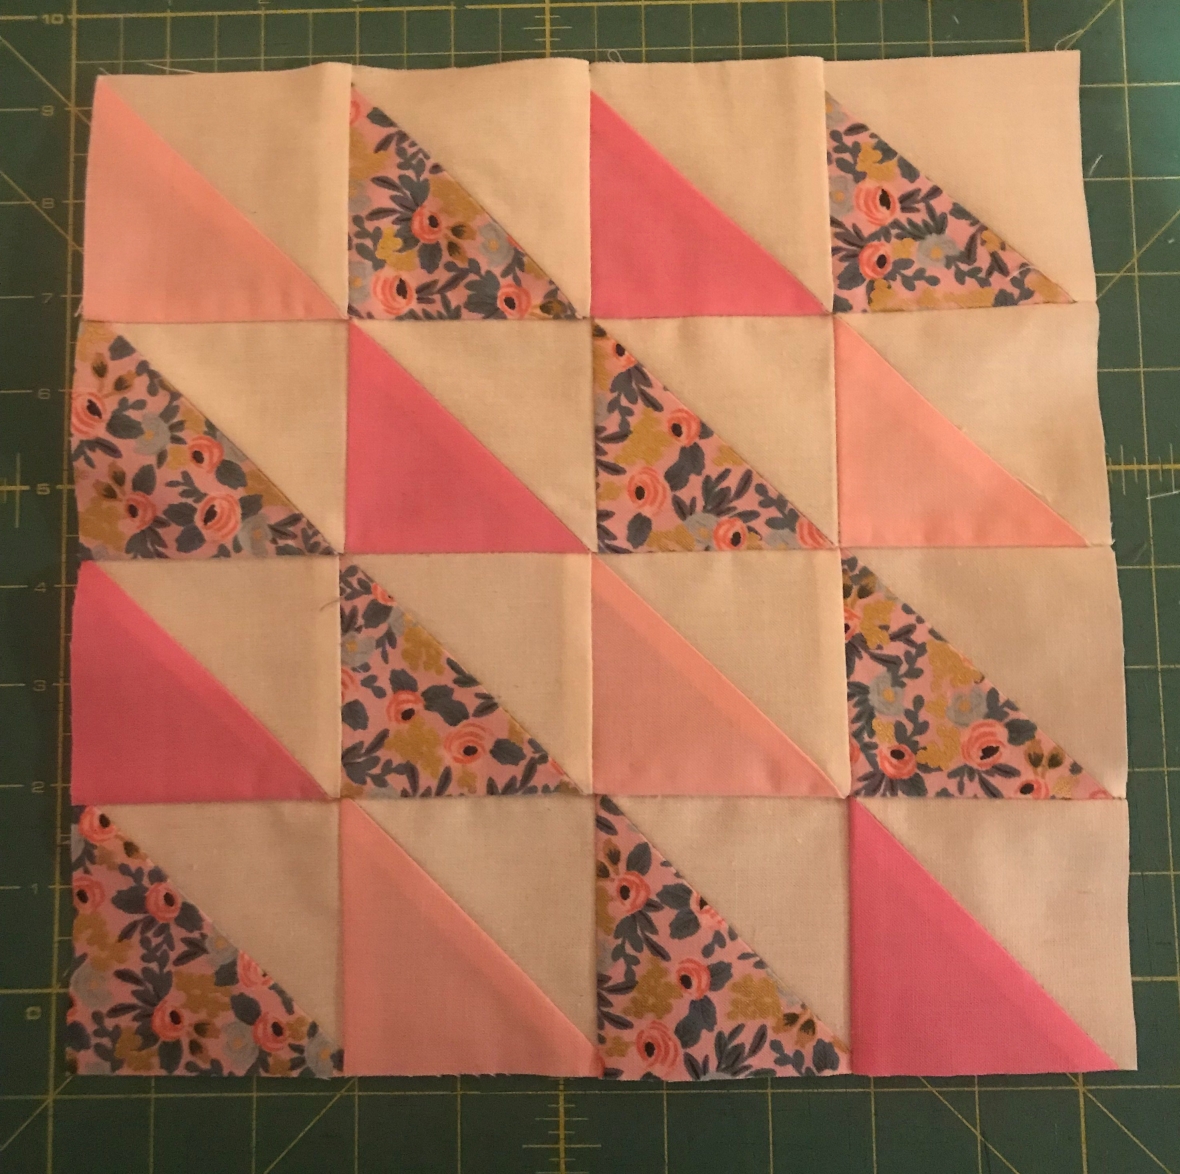
Once you have done this for all 16 blocks you will need to layout your pattern:
You are now going to sew all your pieces together. I like to start with the top row – sew each row together. When pressing seams I like to press even rows to the right and odd rows to the left so its easy to remember. You want your seams to be going in different directions like this:
Once you have each row sewn you will want to then sew each row together, making sure to keep everything the right way up.
Once you have sewn all 4 rows together you will want to press all your seams flat and then you will have your first finished block! Yay!!
Your block should measure 10.5″ x 10.5″.
Thank you so much for joining us for week 1! Tania from Poppy Monroe Collection and I will be here to answer any questions you may have.
Tania will be doing week 2 next Thursday the 18th.
Once you have completed your block post it to the Sew Ottawa! Facebook page with the hashtag #sewottawa and you will be entered into a draw to win a weekly prize!
Let's Get Sashy! It was March Break for many of us this week and I know it was hard to get to the sewing machine. Many of us were travelling, or were quarantined with the great flu of 2018. Kudos to everyone who completed blocks or chimed in to encourage each other. We made it through. You should now have 13 blocks in your Work-In-Progress (WIP) bin. If you're just joining us, you have 13 templates for block options. We set out to complete 16 different blocks. Today we will go through the last 3 blocks of the Sew-A-Long. We will also talk about optional sashing. I know, I know... this is a lot to discuss. Continue along at your own pace. There is lots to discuss coming up and so you will have time to catch up later if you complete less this week. Week 10 Giveaway! Colleen kindly crafted this adorable teacup pincushion for this week's giveaway. I love it so much! the Dresden plate on the top reminds me of the sweetest little flower. I can use any reminder of Spring th...
We celebrate Christmas and gift giving is a part of it in our home. A selling factor to upgrading my sewing machine was the possibility of giving hand-made gifts over the holidays. "It will pay for itself" was the discussion as we had 7 quilts lined up for a Long Arm service. So I have here, a reflection of some of this year's projects (aka the ones I photographed). I was lucky enough to scoop up this year's Christmas Vintage custom french terry from Blended Thread Fabrics for the children's jammy-jams. If you haven't experienced Hollie's custom fabric bases, you absolutely should join her Facebook group here for details on upcoming rounds. Both the Cotton Lycra and French terry are incredibly stretchy with beautiful recovery. I completed a couple of quilting projects for the family, and managed to snap a photo of a couple of them. In the summer, I came across a yard sale, hosted by a "retired" quilter. She had many beautiful bati...
Welcome to Week 6! You have some serious quilt real estate happening now. You might feel equally excited because things are looking "quilty" and overwhelmed because there has been so much work and still no snuggly blanket! Keep at it, we'll soon get to talking about putting the top together and the whole quilting process. Last week, Colleen generously offered up a Frixion Pen and Colour Catchers! I use these in my in sewing room often. I use Colour Catchers with each wash of new fabrics. I also gift one sheet with every quilt I gift with a little note. Speaking of gifted quilts - have you considered adding a quilt tag to your finished project? I love adding these to mine as that final personal touch. If this interests you, start thinking about what you might want to do. You can just hand write a message, sign and date using a fabric marker (I thought this one was cute). You can use your printer and freezer paper as another method. You could contact someone like La...


Comments
Post a Comment